
diff options
| author | krakenrf <78108016+krakenrf@users.noreply.github.com> | 2022-10-18 11:16:57 +0200 |
|---|---|---|
| committer | krakenrf <78108016+krakenrf@users.noreply.github.com> | 2022-10-18 11:16:57 +0200 |
| commit | 859049e4d50f3ff67369c30fd6582b87b403922b (patch) | |
| tree | 67a47a9e4379d24f036a26cc95844acae700f931 | |
| parent | Updated 12. Kraken Pro Cloud Mapper (markdown) (diff) | |
| download | krakensdr_docs.wiki-859049e4d50f3ff67369c30fd6582b87b403922b.tar krakensdr_docs.wiki-859049e4d50f3ff67369c30fd6582b87b403922b.tar.gz krakensdr_docs.wiki-859049e4d50f3ff67369c30fd6582b87b403922b.tar.bz2 krakensdr_docs.wiki-859049e4d50f3ff67369c30fd6582b87b403922b.tar.lz krakensdr_docs.wiki-859049e4d50f3ff67369c30fd6582b87b403922b.tar.xz krakensdr_docs.wiki-859049e4d50f3ff67369c30fd6582b87b403922b.tar.zst krakensdr_docs.wiki-859049e4d50f3ff67369c30fd6582b87b403922b.zip | |
| -rw-r--r-- | 12.-Kraken-Pro-Cloud-Mapper.md | 38 |
1 files changed, 37 insertions, 1 deletions
diff --git a/12.-Kraken-Pro-Cloud-Mapper.md b/12.-Kraken-Pro-Cloud-Mapper.md index a5b0225..a53b4c1 100644 --- a/12.-Kraken-Pro-Cloud-Mapper.md +++ b/12.-Kraken-Pro-Cloud-Mapper.md @@ -38,6 +38,8 @@ You should now see the station added on the left sidebar. Click the gear icon ne Under the device settings heading you should see an `APIKey`. Copy this value and store it for the next section. +Repeat these steps for as many KrakenSDRs as you are setting up. (During the alpha you are restricted to three maximum KrakenSDRs on the map) + ### Setup your Local KrakenSDR Software Next you will need to set up your local KrakenSDR software via it's Web GUI. @@ -50,7 +52,41 @@ In `Kraken Pro Key`, paste in the `APIKey` that you got from the mapper in the p Change location source to `Static` and enter the Latitude, Longitude and Heading of the antenna array. -Now click the `Save Configuration` button at the top. At this stage you now need to reboot your KrakenSDR. +Now click the `Save Configuration` button at the top. + +At this stage you now need to reboot your KrakenSDR. + +## Starting the Mapper +To start visualizing data click on the button that currently says `local data`. This will switch it to the `remote data` mode. + +After a few minutes you should see the DOA lobe and bearing lines on the map. + +## Options and Features + +### Main configure button (top right gear icon) + +**Heatmap Size:** Total size from edge to edge in kilometers of the heatmap grid. Set appropriately for your expected search space. +**Heatmap Resolution:** Number of cells per axis on the grid. A higher value can result in more precise TX localization. But setting it too high can make offline logfile calculations too slow. Maximum resolution is currently capped at 500. + +It's important to note that setting a smaller heatmap size naturally results in a higher resolution grid too. For example, if you set your grid to 100km and resolution to 500, each grid cell has a size of 100,000/500 = 200 x 200 meters. + +Now if you set the grid size to 10km, each cell has a size of 20 x 20 meters. + +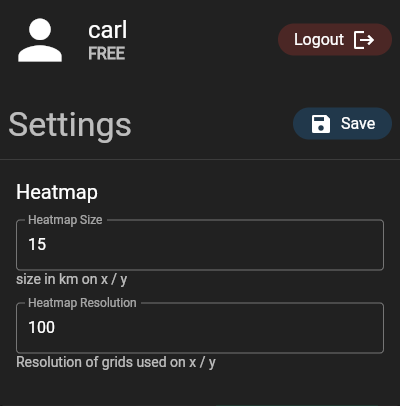 + +### Double Click Menu + +If you double click on the map a menu will pop up. + +**Add Marker:** Adds a reference marker on the map. Useful for marking to location of known transmitters. +**Center Heatmap:** Centers the heatmap grid wherever you clicked. + +### Layer Options +Layer options can be accessed via the layers button  on the top left. + +This allows you to choose between a light or dark street map, or a satellite image map. + +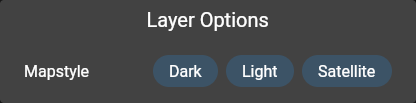 ## Loading an Offline Log Files |